How do I change the nameservers for my domain name with 123-Reg?
So you’ve purchased our web hosting and registered your domain with 123-Reg.co.uk. Now, you’re wondering how to connect your domain to our web servers. Look no further—we’re here to guide you through the setup process step-by-step!
What are nameservers?
Nameservers are like the phone books of the internet. When you type a website address into your browser, nameservers help find the exact location of that website on the internet. They translate the easy-to-remember domain names, like www.example.com, into numerical IP addresses, which are like the street addresses for computers. This translation allows your device to connect to the right server and display the website you want to visit. Essentially, nameservers make navigating the web simple and efficient, without you having to remember a bunch of complicated numbers.
Step 1
Start by logging in to your 123 Reg Control Panel.
Step 2
From your ‘My Products’ page, scroll down to the Domains section. Find the domain you wish to change and click
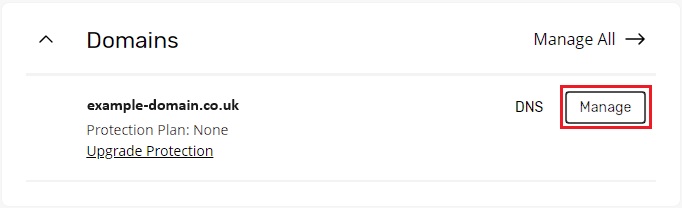
If you can’t find your domain, you may be able to find it on the ‘Manage active products’ page within their legacy Control Panel. Click the link within the ‘We are in the process of migrating our system…’ bar above.
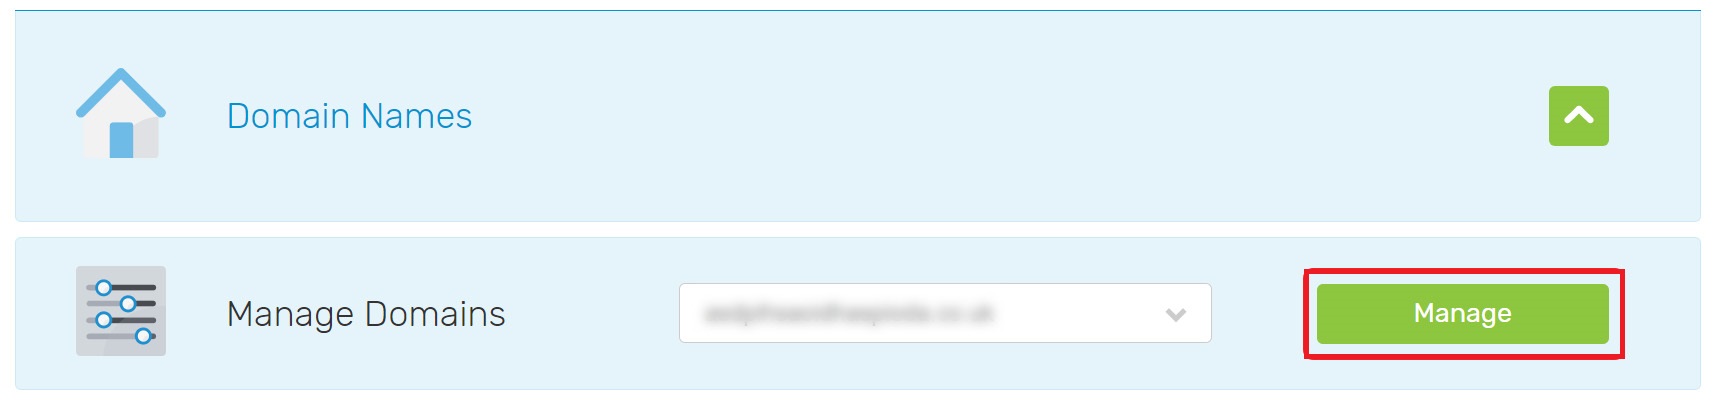
From the legacy Control Panel, select Domain Names within the ‘Manage active products’ section. Choose your domain name from the list and select Manage.
Step 3
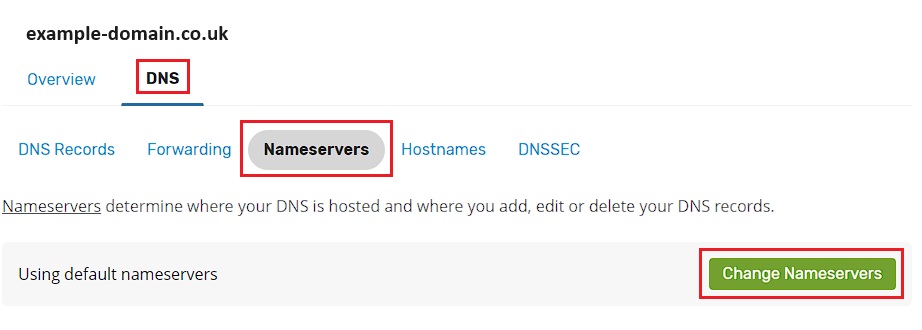
From the ‘Domain Portfolio’ page, click DNS and then select Nameservers. Select the green Change Nameservers
If you’re using our legacy Control Panel, you’ll see the ‘Manage domain’ page. Scroll down to ‘Advanced Domain Settings’ and select Change Nameservers (DNS).

Step 4
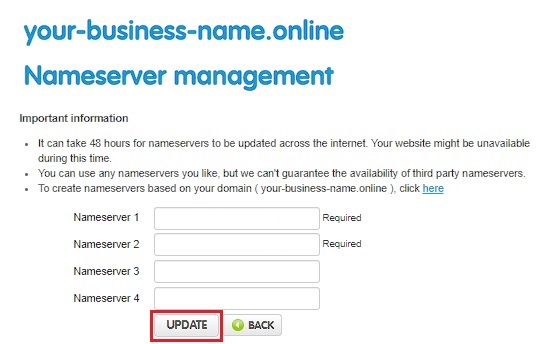
To choose your own nameservers, select I’ll use my own nameservers. Then, enter the details for the nameservers you wish to add into the provided boxes. Then, click Save to complete the change.

If you’re using our legacy Control Panel, enter the details for the nameservers you wish to add into the provided boxes. Then, click Update to complete the change.
Please note
It will take between 24-48 hours for any nameserver changes to become active.